Segment Image Using LAB
SUMMARY
Segment Image Using LAB segments an image by thresholding it in LAB color space.
The image is converted to LAB (Lightness, A for green-red, B for blue-yellow) and only the pixels whose [L, A, B] values fall within the inclusive [lower_bound, upper_bound] range are kept. LAB is designed to be perceptually uniform — equal numeric distances correspond to roughly equal perceived color differences — which makes it a good choice when bounds are chosen by how a color looks rather than by its raw RGB or HSV numbers.
Use this Skill when you want to segment objects using color bounds that need to match how the color visually looks.
The Skill
from telekinesis import cornea

segmented_image = cornea.segment_image_using_lab(
    image=image,
    lower_bound=(120, 50, 50),
    upper_bound=(180, 255, 255),
)Example
Input Image
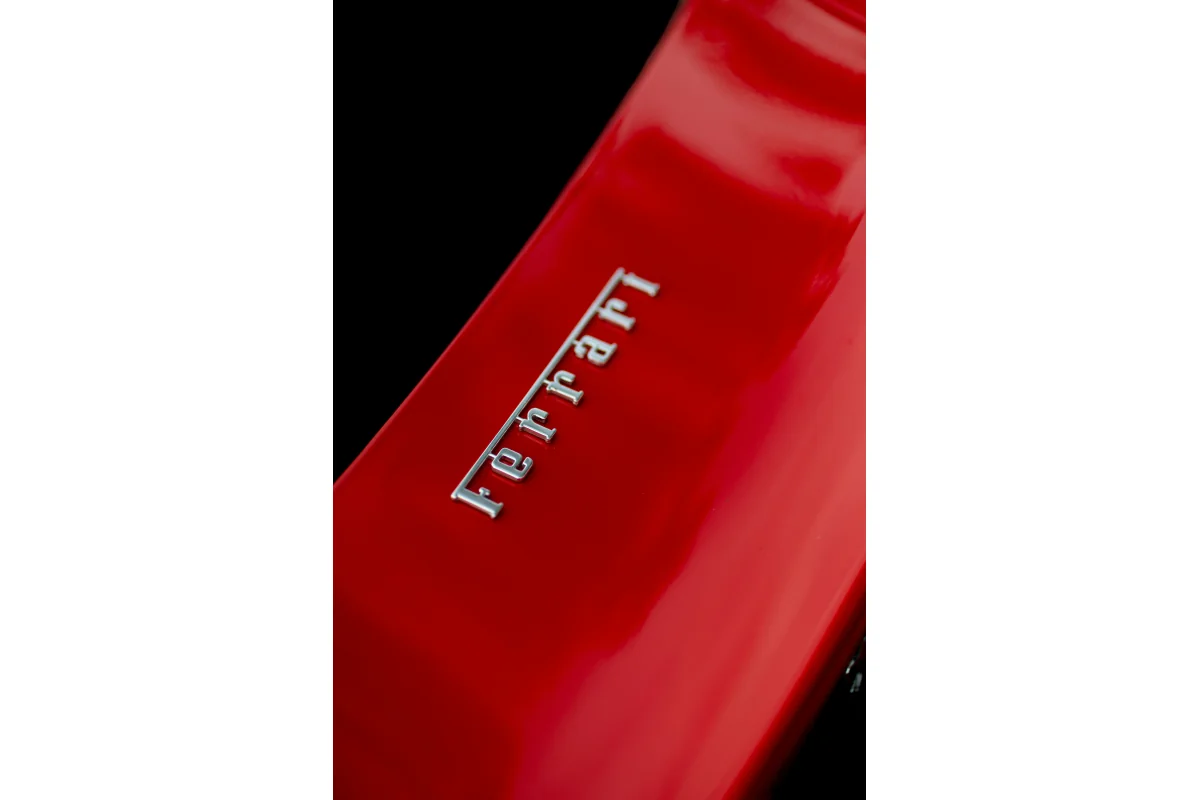
Original image for LAB color segmentation
Output Image
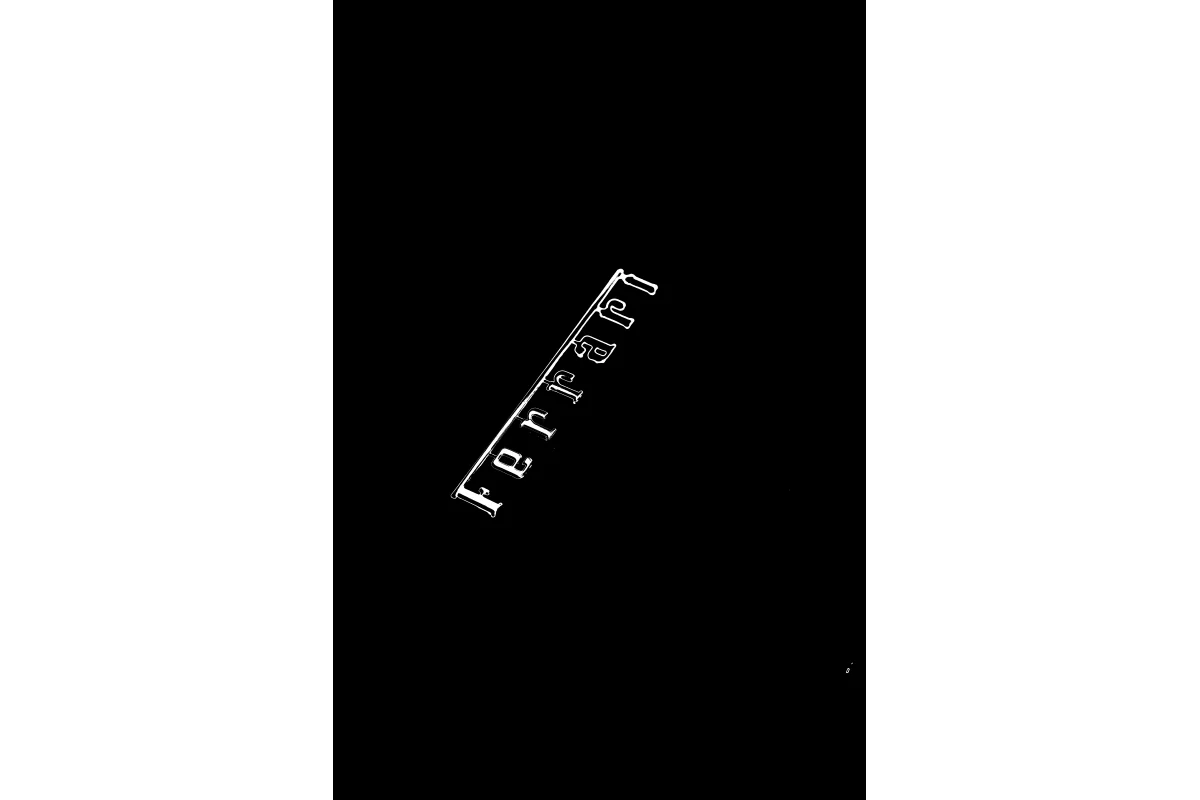
Segmented image by LAB color range
The Code
"""
Demonstrates LAB color space segmentation.
"""

from loguru import logger
import rerun as rr
import rerun.blueprint as rrb

from telekinesis import cornea, datatypes

def segment_image_using_lab_example():
    """Segments an image using LAB color space range."""
    # ===================== Load Image ==========================================
    image_url = "https://assets.telekinesis.ai/examples/v1/images/car_painting.jpg"
    image = datatypes.Image.from_url(url=image_url)

    # ===================== Run Skill ==========================================
    segmented_image = cornea.segment_image_using_lab(
        image=image, lower_bound=(120, 50, 50), upper_bound=(180, 255, 255)
    )

    # ===================== Log ================================================
    logger.success(f"Segmented {image} using LAB color space range.")
    logger.success(f"Results: {segmented_image}")
    logger.info(f"Segmented image label codes: {segmented_image.label_codes}")
    logger.info(f"Segmented image number of labels: {segmented_image.number_of_labels}")
    logger.info(f"Segmented image shape: {segmented_image.shape}")
    logger.info(f"Segmented image dtype: {segmented_image.dtype}")

    # ===================== Visualization  (Optional) ======================
    rr.init("segment_image_using_lab_example", spawn=True)
    blueprint = rrb.Horizontal(
        rrb.Spatial2DView(origin="/input_image", name="Input"),
        rrb.Spatial2DView(origin="/segmented_image", name="Output"),
    )
    rr.send_blueprint(blueprint)
    datatypes.visualize(image, entity_path="/input_image")
    datatypes.visualize(segmented_image, entity_path="/segmented_image")


if __name__ == "__main__":
    segment_image_using_lab_example()
Runnable examples are available in the Telekinesis examples repository.
Follow the README in that repository to set up the environment, run this specific example with:
cd telekinesis-examples
python examples/segmentation/segment_image_using_lab.py
Parameter Configuration
These parameters control the input image and the inclusive LAB range used to decide which pixels are marked as foreground.
| Parameter | Type | Default | Description |
|---|---|---|---|
image | datatypes.Image | np.ndarray | required | Input image to segment, shape (H, W, 3) |
lower_bound | list[int] | tuple[int] | [0, 0, 0] | Inclusive lower [L, A, B] bound |
upper_bound | list[int] | tuple[int] | [255, 255, 255] | Inclusive upper [L, A, B] bound |
Returns
| Type | Description |
|---|---|
datatypes.SegmentationImage | A per-pixel label map, shape (H, W), where 0 marks pixels outside the LAB range and 1 marks pixels inside it. Use .data for the raw label array, .label_codes for the sorted array of unique ids present, .number_of_labels for how many distinct labels were found, and .shape/.dtype for its size and label dtype. |
Raises
| Exception | Condition |
|---|---|
TypeError | A parameter's value does not match its expected type (see the Parameter Configuration table above) |
ValueError | image is not shape (H, W, 3); lower_bound or upper_bound does not have exactly 3 elements; or any channel is outside [0, 255] |
ConfigurationError | The TELEKINESIS_API_KEY environment variable is not set |
SerializationError | The request input failed to serialize, the response was not returned as an Arrow stream, or the response failed to deserialize |
RequestTimeoutError | The request to the Cornea service timed out |
TransportError | A network failure occurred before a response was received |
ClientError | The Cornea service rejected the request due to invalid or malformed input (HTTP 400/422), an unrecognized endpoint (HTTP 404), or another unexpected 4xx response |
AuthenticationError | The API key was rejected as invalid or expired (HTTP 401) |
AuthenticationServiceError | The authentication service returned an invalid response, was temporarily unavailable, or timed out (HTTP 502/503/504) |
ServerError | The Cornea service returned a 5xx or otherwise unexpected error response |
How to Tune the Parameters
The segment_image_using_lab skill exposes two parameters that together define the accepted LAB range.
In general, a narrower range increases precision by excluding more unrelated pixels, while a wider range is more forgiving of variation in the target color but risks including background pixels that happen to fall inside it.
lower_bound
- Controls: The inclusive lower
[L, A, B]bound; a pixel is excluded if any of its channels falls below the corresponding bound. - Units: Each channel on a 0–255 scale.
L(lightness) runs from black to white;Aruns from green (low) to red (high);Bruns from blue (low) to yellow (high), with 128 as the neutral midpoint forAandB. - Default:
[0, 0, 0] - Raise
Lto exclude darker pixels - Move
A/Btoward 128 to narrow in on neutral, less saturated colors; move away from 128 to target a specific hue - Typical range: each channel 0–255, tightened around values sampled from the target color
upper_bound
- Controls: The inclusive upper
[L, A, B]bound; a pixel is excluded if any of its channels exceeds the corresponding bound. - Units: Same as
lower_bound. - Default:
[255, 255, 255](i.e. everything, by default) - Lower
Lto exclude brighter pixels - Move
A/Bto bracket the target hue on the red/green and yellow/blue axes - Typical range: each channel 0–255, tightened around values sampled from the target color
TIP
This skill's [L, A, B] bounds use the same 0–255, 8-bit scaling for all three channels (rather than L's native 0–100 range or A/B's native -128–127 range). If you pick bounds with an external color tool, convert its LAB output to this 0–255 scaling first, or the bounds will be off.
Where to Use the Skill
Common pipelines include:
- Perceptual color matching – e.g. matching a car's paint color the way a human would perceive it
- Quality control on painted or coated surfaces – flagging color deviations that need to align with visual inspection
- Material classification by visual color – sorting parts using a range picked to match human perception rather than raw sensor values
Alternative Skills
| Skill | vs. Segment Image Using LAB |
|---|---|
| segment_image_using_rgb | RGB thresholds raw pixel numbers directly. Use LAB when bounds should match perceived color differences rather than raw RGB numbers; use RGB for the simplest, most direct threshold. |
| segment_image_using_hsv | HSV separates hue from brightness, which is generally more robust to lighting changes. Use HSV when lighting robustness matters most; use LAB when perceptual uniformity matters most. |
| segment_image_using_ycrcb | YCrCb separates luma from chrominance and is tuned for skin-tone-like ranges. Use YCrCb for skin-tone or other chrominance-specific ranges; use LAB for perceptually uniform color bounds in general. |
When Not to Use the Skill
Do not use Segment Image Using LAB when:
- You need maximum robustness to lighting changes – HSV's hue/value separation is more directly built for that
- You're targeting skin tones specifically – YCrCb's chrominance channels are tuned for that case, with defaults to match
- Color is not a distinguishing feature of the target – consider a non-color-based segmentation skill instead