Normalize Image Intensity
SUMMARY
Normalize Image Intensity normalizes image intensity values using minmax or histogram methods.
Intensity normalization adjusts pixel values to a standard range (e.g., 0–255), improving contrast and making images suitable for downstream algorithms that expect normalized inputs. Supports minmax scaling and histogram-based methods with configurable alpha/beta for linear mapping.
Use this Skill when you want to normalize pixel intensity for consistent processing.
The Skill
from telekinesis import pupil

normalized_image = pupil.normalize_image_intensity(
    image=image,
    alpha=125,
    beta=0.0,
    normalization_method="minmax",
    output_depth="8bit",
)Example
Input Image
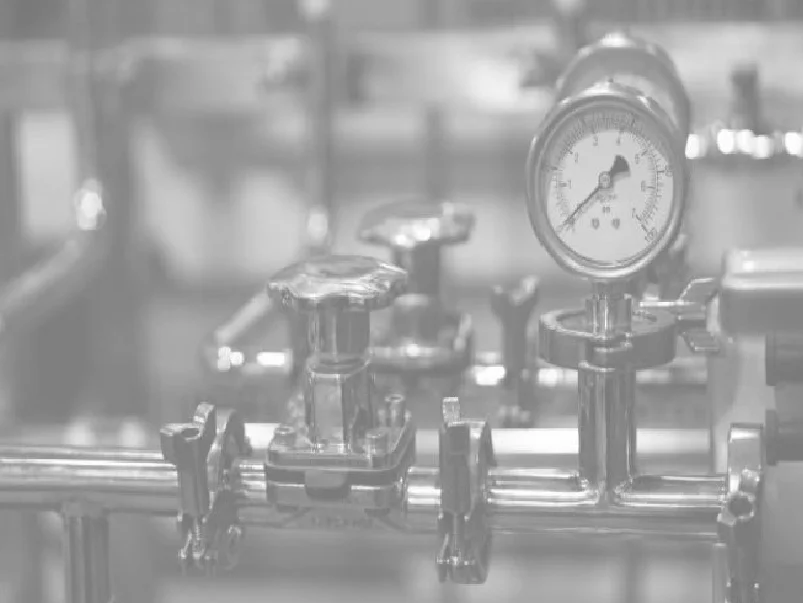
Original image
Normalized Image
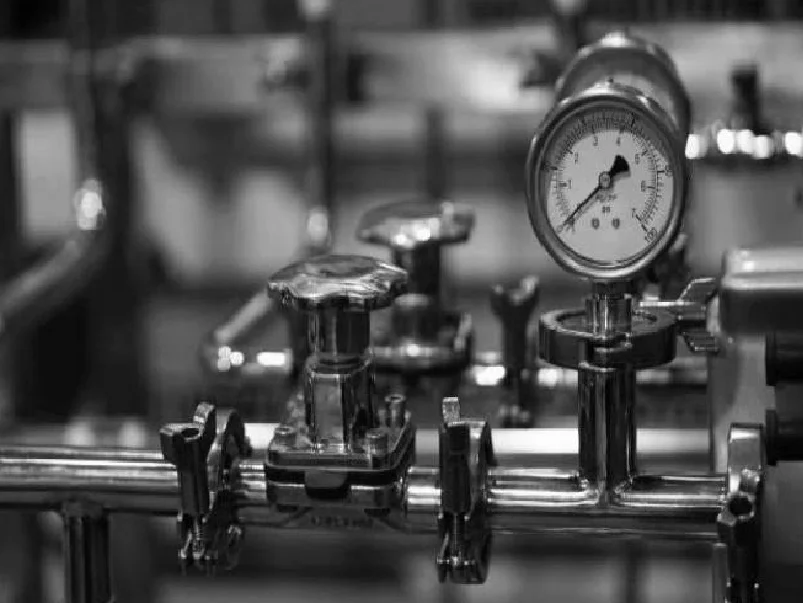
Normalized image with improved contrast
The Code
from telekinesis import pupil
from datatypes import io
import pathlib
from loguru import logger

DATA_DIR = pathlib.Path("path/to/telekinesis-data")

# Load image
filepath = str(DATA_DIR / "images" / "gauge_washed.webp")
image = io.load_image(filepath=filepath)
logger.success(f"Loaded image from {filepath}")

# Normalize image intensity values
normalized_image = pupil.normalize_image_intensity(
    image=image,
    alpha=0.0,
    beta=255.0,
    normalization_method="minmax",
    output_format="8bit",
)

# Access results
normalized_image_np = normalized_image.to_numpy()
logger.success("Normalized intensity. Output image shape: {}", normalized_image_np.shape)
The Explanation of the Code
The code begins by importing the necessary modules: pupil for image processing operations, io for data handling, pathlib for path management, and loguru for logging.
from telekinesis import pupil
from datatypes import io
import pathlib
from loguru import logger
Next, an image is loaded from a .png file using the io.load_image function. The input image may be grayscale or color; intensity normalization supports both formats.
DATA_DIR = pathlib.Path("path/to/telekinesis-data")

# Load image
filepath = str(DATA_DIR / "images" / "gauge_washed.webp")
image = io.load_image(filepath=filepath)
The main operation uses the normalize_image_intensity Skill from the pupil module. This Skill normalizes image intensity values using minmax or histogram methods to map pixel values to a standard range. The parameters can be tuned to control normalization method, output range, and bit depth depending on the characteristics of the input image.
normalized_image = pupil.normalize_image_intensity(
    image=image,
    alpha=0.0,
    beta=255.0,
    normalization_method="minmax",
    output_format="8bit",
)
Finally, the normalized image is converted to a NumPy array using to_numpy() for further processing, visualization, or downstream tasks.
normalized_image_np = normalized_image.to_numpy()
logger.success(f"Output image shape: {normalized_image_np.shape}")
This operation is particularly useful in robotics and vision pipelines for contrast improvement, consistent processing, and downstream algorithm compatibility, where normalizing pixel intensity to a standard range is required.
Running the Example
Runnable examples are available in the Telekinesis examples repository. Follow the README in that repository to set up the environment. Once set up, you can run this specific example with:
cd telekinesis-examples
python examples/pupil_examples.py --example normalize_image_intensity
How to Tune the Parameters
The normalize_image_intensity Skill has 4 parameters that control the intensity mapping:
alpha (default: 0.0):
- Value to normalize to or the lower range boundary in case of range normalization
- Units: Intensity value
- For minmax: lower bound of output range
- Typical range: 0.0–255.0
beta (default: 255.0):
- Upper range boundary in case of range normalization; not used for norm normalization
- Units: Intensity value
- For minmax: upper bound of output range
- Typical range: 0.0–255.0
normalization_method (default: "minmax"):
- The normalization algorithm
- Options: "minmax", "inf", "l1", "l2"
- "minmax" for linear scaling from image min–max to [alpha, beta] range
output_format (default: "same as input"):
- The output bit depth
- Options: "8bit", "16bitS", "16bitU", "32bit", "64bit", "same as input"
- Use "same as input" to preserve input dtype; "8bit" for uint8 (0–255)
TIP
Best practice: Use minmax for general contrast improvement. If using l1 or l2 normalization methods, ensure output_format is greater than 8bit (e.g., "32bit" or "64bit"), else the output image may appear black due to clipping.
Where to Use the Skill
Normalize Image Intensity is commonly used in the following pipelines:
- Preprocessing - Normalize before feature extraction or ML models
- Multi-image comparison - Align intensity ranges across images
- Low-contrast enhancement - Improve visibility of faint features
- Threshold segmentation - Prepare for fixed-threshold methods
Related skills to build such a pipeline:
enhance_image_using_clahe: Alternative contrast enhancementsegment_image_using_threshold: Often benefits from normalized input
When Not to Use the Skill
Do not use Normalize Image Intensity when:
- You need adaptive local contrast (Use enhance_image_using_clahe instead)
- Preserving absolute intensity matters (Normalization changes scale)
- Images are already in a standard range (Unnecessary processing)