Zivid
SUMMARY
The Zivid class provides a Python interface for Zivid 3D cameras, supporting single-frame capture of RGB images, depth images, and 3D point clouds, as well as YAML-based settings management and per-acquisition parameter control. It wraps the Zivid SDK to handle device connection, capture configuration, and safe teardown.
Requirements: The Zivid SDK must be installed and a supported Zivid camera must be connected via Ethernet or USB.
Tested devices:
- Zivid 2 M70
Useful Links
Installation
Install Medulla first — see Installation.
Then install the Zivid-specific dependencies:
Download and Install Zivid SDK
- Download and install the latest Zivid SDK from the Zivid Downloads page.
- Install Zivid Studio, which is included with the SDK.
- Connect your Zivid camera.
- Open Zivid Studio to verify the installation:
- Confirm the camera is detected and listed.
- Capture a test frame to validate the connection.
- Tune 3D and 2D acquisition settings (aperture, exposure, gain, brightness).
- Extra: Export your settings as a
.ymlfile via File → Export Capture Settings for use withload_settings.
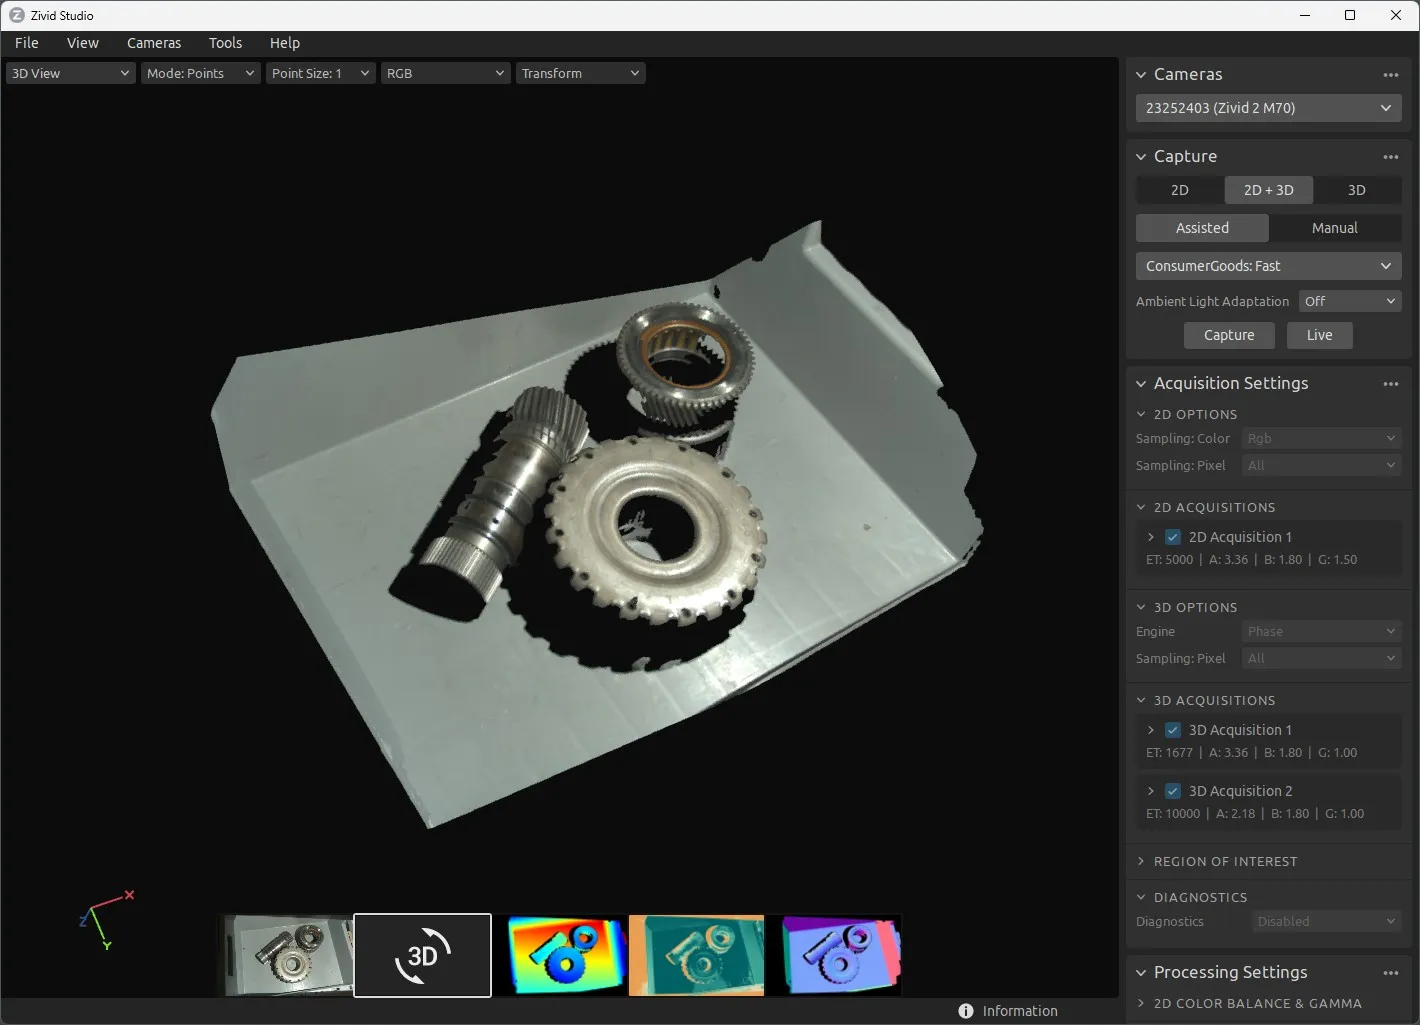
Zivid Studio after successfully installing and connecting the camera.
Python Packages
Install the Zivid dependencies via the Telekinesis SDK:
pip install telekinesis-ai[medulla-zivid]Getting Started
WARNING
Examples were tested on Windows 11 only.
After verifying the installation with Zivid Studio, make sure to close the studio or disconnect the camera within it before running any medulla script.
WARNING
Only one program can access the camera at a time. Make sure to disconnect from active cameras in Zivid Studio before running the scripts.
Capture a point cloud with a Zivid camera from medulla:
from telekinesis.medulla.cameras import zivid

camera = zivid.Zivid(name="my_zivid_camera")
camera.connect()
pc = camera.capture_pointcloud()
print(pc.positions)
camera.disconnect()
Settings Management
Zivid cameras are configured through settings files exported from Zivid Studio. You can load and save these .yml files at runtime:
# Load settings exported from Zivid Studio
camera.load_settings("settings_inspection_far.yml")

# Fine-tune individual parameters
camera.set_parameter("aperture", 5.6)
camera.set_parameter("color_gain", 2.0)

# Save the modified settings for later use
camera.save_settings("my_custom_settings.yml")
The following parameters can be read and written via get_parameter / set_parameter:
| Parameter | Type | Scope |
|---|---|---|
aperture | float | int | Per 3D acquisition |
exposure_time | datetime.timedelta | Per 3D acquisition |
gain | float | int | Per 3D acquisition |
brightness | float | int | Per 3D acquisition |
color_aperture | float | int | Per 2D acquisition |
color_exposure_time | datetime.timedelta | Per 2D acquisition |
color_gain | float | int | Per 2D acquisition |
color_brightness | float | int | Per 2D acquisition |
noise_threshold | float | int | Global (all captures) |
outlier_threshold | float | int | Global (all captures) |
For HDR captures with multiple acquisitions, use the acquisition_index argument to target a specific acquisition.
Examples
| Skill | Description |
|---|---|
| Connect | Open a connection to the camera hardware |
| Disconnect | Release the camera connection and free resources |
| Capture Color Image | Capture one colour image and visualise with Rerun |
| Capture Depth Image | Capture one depth frame with colour map and visualise with Rerun |
| Capture Point Cloud | Capture one colour-mapped 3D point cloud and visualise with Rerun |
| Load Settings | Load a settings YAML file exported from Zivid Studio |
| Save Settings | Save the current settings to a YAML file |
| Get Parameter / Set Parameter | Read or write acquisition parameters such as aperture and gain |
| Get Intrinsics | Retrieve camera intrinsic parameters for calibration workflows |