Enhance Image Using CLAHE
SUMMARY
Enhance Image Using CLAHE applies Contrast Limited Adaptive Histogram Equalization for local contrast enhancement.
CLAHE enhances local contrast by applying histogram equalization on small image regions while limiting contrast amplification to prevent noise over-enhancement. This makes it particularly effective for images with uneven illumination or low local contrast.
Use this Skill when you want to enhance local contrast while controlling noise amplification.
The Skill
from telekinesis import pupil

enhanced_image = pupil.enhance_image_using_clahe(
    image=image,
    clip_limit=10.0,
    tile_grid_size=4,
    color_space="lab",
)Example
Input Image
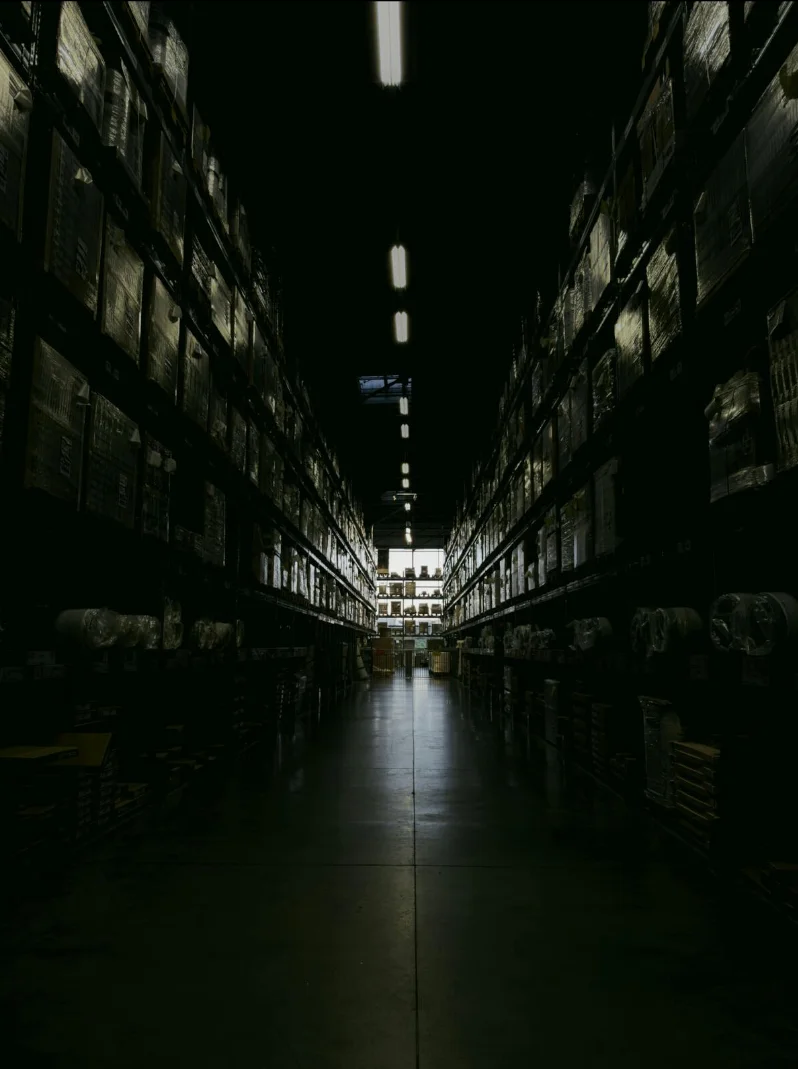
Original low-contrast image
Enhanced Image
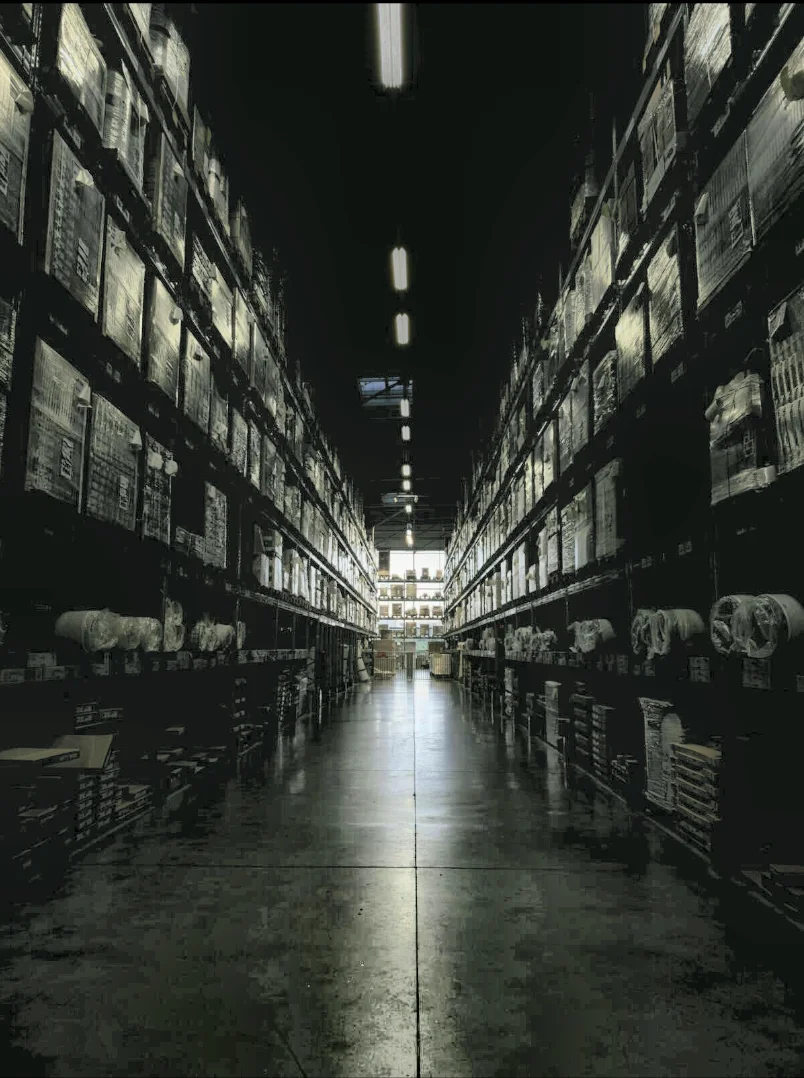
Enhanced with CLAHE - improved local contrast
The Code
from telekinesis import pupil
from datatypes import io
import pathlib
from loguru import logger

DATA_DIR = pathlib.Path("path/to/telekinesis-data")

# Load image
filepath = str(DATA_DIR / "images" / "dark_warehouse.jpg")
image = io.load_image(filepath=filepath)
logger.success(f"Loaded image from {filepath}")

# Enhance image using CLAHE
filtered_image = pupil.enhance_image_using_clahe(
    image=image,
    clip_limit=10.0,
    tile_grid_size=8,
    color_space="lab",
)

# Access results
filtered_image_np = filtered_image.to_numpy()
logger.success("Applied CLAHE filter. Enhanced output image shape: {}", filtered_image_np.shape)
The Explanation of the Code
The code begins by importing the necessary modules: pupil for image processing operations, io for data handling, pathlib for path management, and loguru for logging.
from telekinesis import pupil
from datatypes import io
import pathlib
from loguru import logger
Next, an image is loaded from a .jpg file using the io.load_image function. The input image may be either grayscale or color; CLAHE supports both formats.
DATA_DIR = pathlib.Path("path/to/telekinesis-data")

# Load image
filepath = str(DATA_DIR / "images" / "dark_warehouse.jpg")
image = io.load_image(filepath=filepath)
The main operation uses the enhance_image_using_clahe Skill from the pupil module. This Skill applies Contrast Limited Adaptive Histogram Equalization on small image regions while limiting contrast amplification to prevent noise over-enhancement. The parameters can be tuned to control enhancement strength and local detail.
enhanced_image = pupil.enhance_image_using_clahe(
    image=image,
    clip_limit=10.0,
    tile_grid_size=4,
    color_space="lab",
)
logger.success(f"Applied CLAHE with enhanced image shape as {enhanced_image.to_numpy().shape}")
Finally, the enhanced image is converted to a NumPy array using to_numpy() for further processing, visualization, or downstream tasks.
enhanced_image_np = enhanced_image.to_numpy()
logger.success(f"Output image shape: {enhanced_image_np.shape}")
This operation is particularly useful in robotics and vision pipelines for medical imaging, low-light enhancement, detail enhancement, and preprocessing, where local contrast improvement with controlled noise is required.
Running the Example
Runnable examples are available in the Telekinesis examples repository. Follow the README in that repository to set up the environment. Once set up, you can run this specific example with:
cd telekinesis-examples
python examples/pupil_examples.py --example enhance_image_using_clahe
How to Tune the Parameters
The enhance_image_using_clahe Skill has 3 parameters that control the contrast enhancement behavior:
clip_limit (default: 2.0): Controls the contrast limiting threshold.
- Units: Contrast limit (dimensionless)
- Increase to create stronger enhancement
- Decrease for subtler enhancement and less noise
- Typical range: 1.0–8.0 (min: 1.0, max: 8.0)
- Use 1.0–2.0 for subtle enhancement, 2.0–4.0 for moderate, 4.0–8.0 for strong
tile_grid_size (default: 8): Controls the size of the grid for adaptive processing.
- Units: Grid cells (e.g., 8 means 8×8 grid)
- Increase for coarser, faster processing
- Decrease for finer local detail
- Typical range: 2–16 (min: 2, max: 16)
- Use 2–4 for fine detail, 4–8 for balanced, 8–16 for coarse
color_space (default: "gray"): Specifies the color space in which CLAHE is applied.
- Options:
gray- For grayscale imagesrgb- For RGB imageslab- Avoids color distortion when enhancing color images (recommended)
- Use
labfor color images to preserve hue
TIP
Best practice: CLAHE is excellent for enhancing images with varying illumination. Start with clip_limit=2.0 and tile_grid_size=8. Increase clip_limit gradually to avoid noise amplification.
Where to Use the Skill
Enhance Image Using CLAHE is commonly used in the following pipelines:
- Medical imaging - Enhance X-rays, CT scans
- Low-light enhancement - Improve visibility in dark images
- Detail enhancement - Bring out hidden details
- Preprocessing - Enhance before feature extraction
Related skills to build such a pipeline:
normalize_image_intensity: Global intensity normalizationenhance_image_using_white_balance: Correct color castfilter_image_using_gaussian_blur: Pre-smooth before enhancement
Alternative Skills
| Skill | vs. Enhance Image Using CLAHE |
|---|---|
| normalize_image_intensity | Use for global intensity normalization; CLAHE for local adaptive enhancement. |
| enhance_image_using_auto_gamma_correction | Use for gamma correction; CLAHE for local contrast. |
When Not to Use the Skill
Do not use Enhance Image Using CLAHE when:
- Uniform illumination (Standard histogram equalization may suffice)
- Already high contrast (May over-enhance)